Newer post
Extending 'GPTs Are GPTs' to Firms
A new paper on the impact of AI on labor demand at the firm level.
June 2, 20253 min read
LLM
A step-by-step guide on hosting your own private Large Language Model and RAG system using Synology, Tailscale, Caddy, and Ollama—all protected behind a lightweight VPN and accessible anywhere.


The other day, I was reading this article by Tim Hopper about how to host your Synology and Synology services on their own (sub)domains all while hiding each service behind a personal VPN. As I was following along the article, implementing this solution on my own Synology, I realized—wait, why couldn't I use my Synology to serve my own LLM service through a custom domain too? For that matter, if I built a RAG around my Obsidian notes (also stored and served on my Synology), I could theoretically have my own note-based RAG accessible anywhere in the world, without taking up precious compute on my local computer to serve it.
What followed was a few hours of tinkering and learning. After troubleshooting a few mistakes made along the way, I had it: my own local model and RAG system hidden behind a lightweight VPN (Tailscale), accessible only by me anywhere in the world (with an internet connection).
In this first article, I will walk you through how I built this system up until you are able to access your own, personal LLM located safely behind a Tailscale VPN. In a follow-up article, I will describe how I built a RAG system for my notes that I can query.
Services Used In This Article
| Service | Description | Cost(s) |
|---|---|---|
| Cloudflare | For hosting a domain. | Domain reservation, potential transfer costs from a different host |
| Caddy | For creating a reverse-proxy service for my sub-domains. | Free |
| Tailscale | A lightweight VPN to hide my services behind. | Free for personal use |
| Ollama | For building and serving my LLM. | Free |
| Synology NAS | A personal home cloud solution for hosting files, services, and much more. | Pricey. Check out NewEgg or B&H, they periodically have sales. |
| (Optional) Raspberry Pi | For hosting my reverse proxy service (you can just use Synology if you'd like). | You can get a Raspberry Pi for "cheap" these days on Amazon or wherever you buy your tech. If you want to be really rebellious, you could even try using an old fold |
A brief note about where to place your reverse proxy. Your Synology NAS (or whatever cloud solution you use) is very likely capable of hosting the reverse proxy. Most of the instructions below will apply the same way. The reason I host my reverse proxy on a separate machine than my NAS is:
To get started, let's begin by creating our reverse proxy server. For the uninitiated, a reverse proxy server is basically just system that sits between a client device—which hopes to access certain backend services—and the services themselves. Reverse proxies are appealing for many reasons. For our purposes they're convenient because they:
I'm going to be setting up my reverse proxy on my Raspberry Pi. Should you want to set up a different way, there are plenty of articles like this one.
The first thing you'll want to do is find your Raspberry Pi IP address (or whatever machine you plan to host your reverse proxy on). Note, the machine you host on should be an always-on server. So a personal laptop probably won't do. If you don't know what network your Pi / machine is on, you can try the following lines of code try the arp-scan package to scan your local network for a Raspberry Pi.
Bash1sudo arp-scan --interface=eth0 --localnet # alternatively try wlan0
Once you see your pi, you'll want to ssh into the network. You'll need the hostname of the service. Usually the hostname is raspberrypi. Altogether you'll type:
Bash1ssh raspberrypi@<LOCAL IP>
Here's an example of what that will look like.
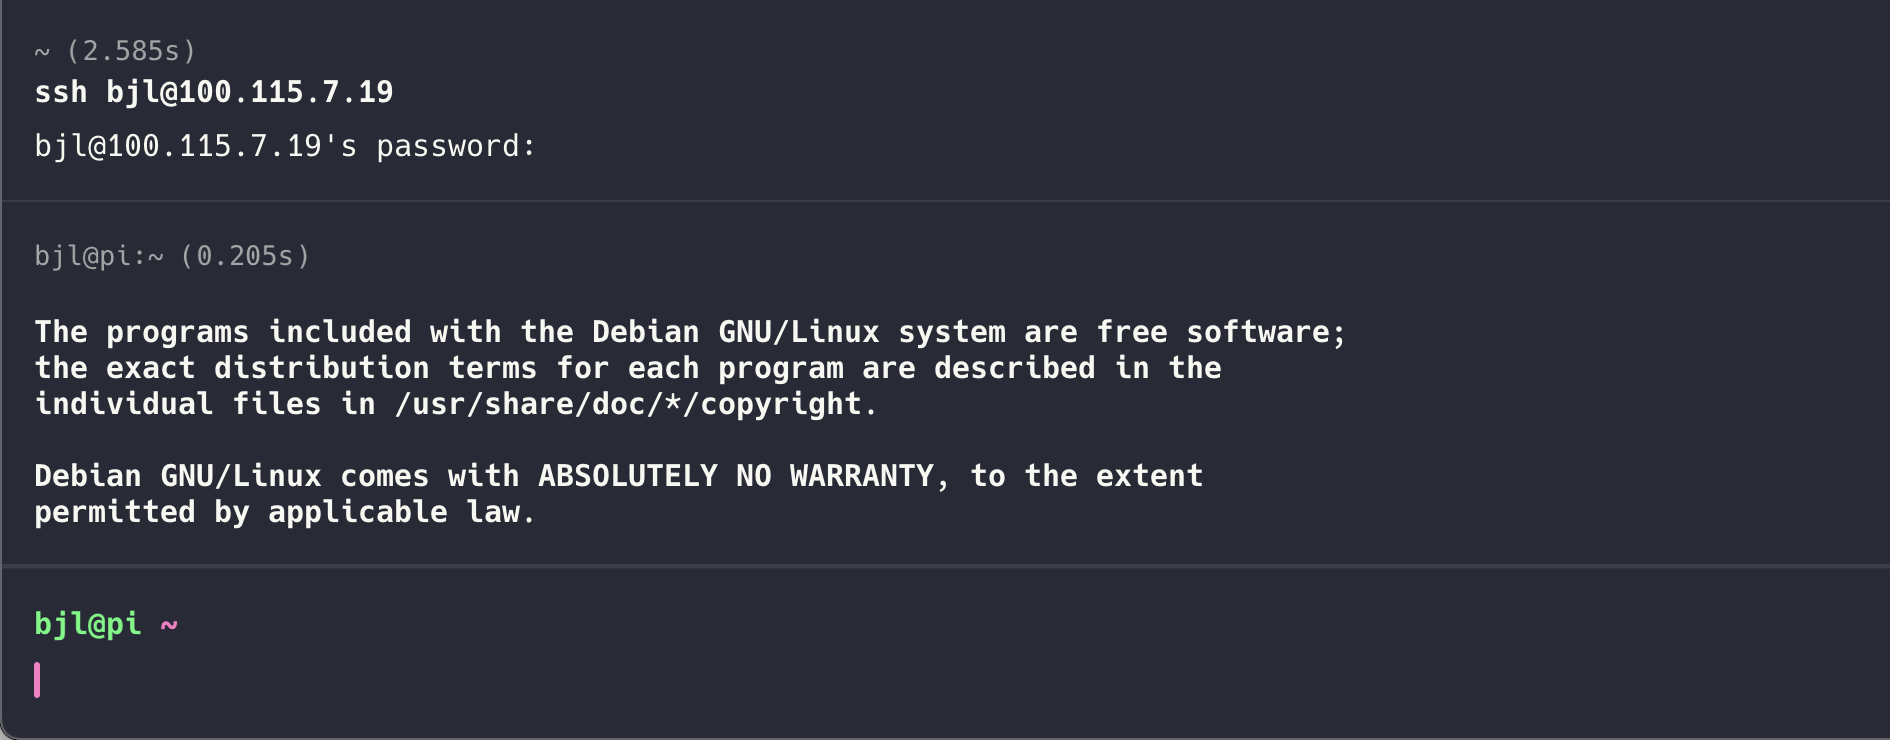
SSHing into your reverse proxy machine via CLI
Once you’re connected to your “always-on” reverse proxy machine (in my case, a Raspberry Pi), we'll want to install Tailscale to keep everything private. Tailscale creates a lightweight VPN, meaning only devices you’ve authenticated can access your reverse proxy—or any other service behind it.
Install Tailscale
If you’re on a Raspberry Pi, you can follow Tailscale’s official docs or run:
Bash1curl -fsSL https://tailscale.com/install.sh | sh
That script detects your Pi’s OS and installs Tailscale for you.
Authenticate Your Pi
Bash1sudo tailscale up
This will give you a link to tailscale.com where you log in with your own account, or SSO using a Google/GitHub/Microsoft account. Once authorized, your Pi will show up in your Tailscale admin panel.
Verify Connectivity
On another device already running Tailscale (like your laptop), run:
Bash1ping <tailscale-ip-of-your-pi>
If you see responses, you’re good to go. No one else on the internet can see that IP—only your Tailscale-connected devices.
Next, let’s do the same on your Synology, so it can join the Tailscale network and expose services via its Tailscale IP.
100.x.x.x.Keep that IP handy—we’ll need it next when we configure Caddy to reverse-proxy Synology services.
If you want to access your home services at a nice custom URL (like home.mydomain.com), you’ll need a domain. You can purchase (or transfer) a domain in a few ways:
Personally, every domain I have, I have now transferred to Cloudflare. I like what they're doing as a company, and appreciate all the options and quality of life use-cases afforded to me with a Cloudflare account. Whichever route you choose, once you have the domain set up in your dashboard, you’ll be ready to add DNS records for your Tailscale IP and configure Caddy.
Before we move on to obtaining a Cloudflare API token, let’s create (or update) the DNS record for the domain/subdomain that will point to your Pi.
home for home.mydomain.com).100.x.x.x).Save the record. Even though this Tailscale IP isn’t publicly routable, Cloudflare will still let you create an A record for it—this is key to how Caddy does its DNS challenge. If you are not using Cloudflare, the API token logic should similarly apply to through your domain provider.
If you’d like to use multiple subdomains (e.g., home.mydomain.com, llm.mydomain.com, photos.mydomain.com, etc.) without adding separate A records each time, you can create a wildcard A record. This instructs Cloudflare that any subdomain of mydomain.com should resolve to the same IP—in our case, your Pi’s Tailscale IP.
* (this is your wildcard subdomain).100.x.x.x).Click Save. Even though 100.x.x.x isn’t publicly routable, Cloudflare will still let you create an A record for it—this is key to how Caddy does its DNS challenge. Now, any subdomain like home.mydomain.com or llm.mydomain.com will resolve to your Pi’s Tailscale IP.
Next, we install Caddy on the Pi to handle the actual reverse proxying.
Install Caddy
First, update your package list and install necessary tools for secure package management.
Bash1sudo apt-get update 2sudo apt-get install -y debian-keyring debian-archive-keyring apt-transport-https
This downloads and installs Caddy's GPG security from Cloudsmith (a package distribution platform).
Bash1curl -1sLf https://dl.cloudsmith.io/public/caddy/stable/gpg.key | sudo gpg --dearmor -o /usr/share/keyrings/caddy-stable-archive-keyring.gpg
Add Caddy's official repository to APT package sources.
Bash1curl -1sLf "https://dl.cloudsmith.io/public/caddy/stable/deb/debian.repo" | sudo tee /etc/apt/sources.list.d/caddy-stable-debian.repo
Install Caddy fully into your system
Bash1sudo apt-get update 2sudo apt-get install caddy
Setup your Caddy folder and permissions. Caddy will need access to /etc/caddy.
Bash1# Create the Caddy folder in /etc/ 2sudo mkdir /etc/caddy/
Give write permissions to the folder
Bash1sudo chmod 755 /etc/caddy/
Here we'll create an API token that has permission to edit / access your DNS records for your personal domain certificate.
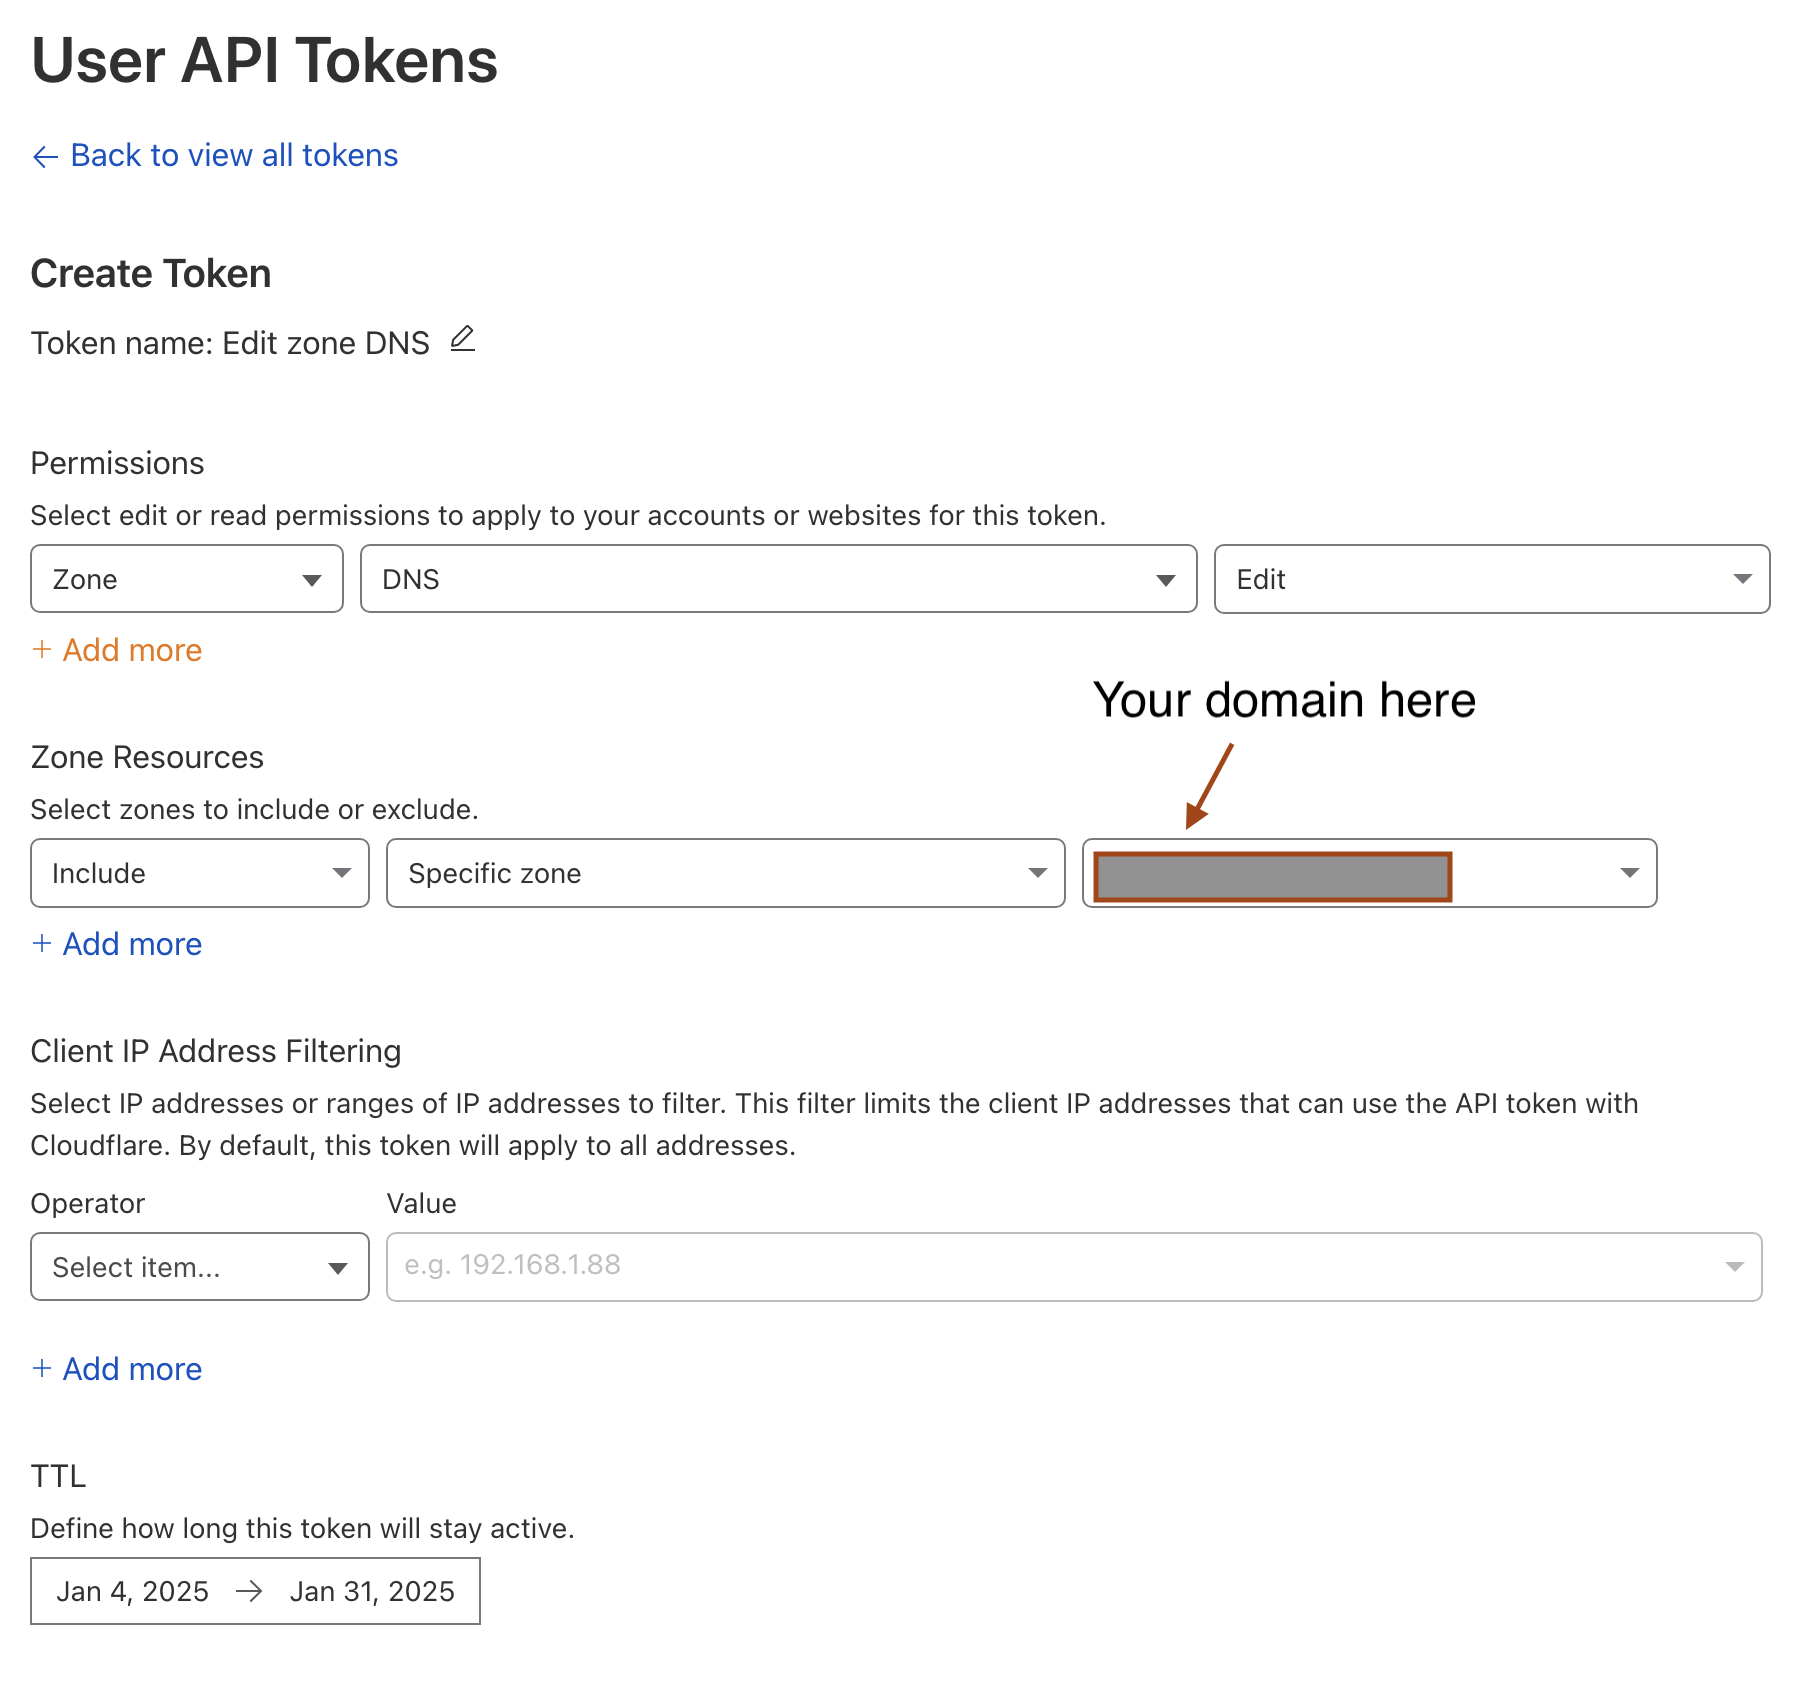
Accessing your Cloudflare DNS API key
Create a file called caddy.env (or cloudflare.env, etc.) where Caddy can read environment variables (you can keep it in /etc/caddy, for instance). touch /etc/caddy/caddy.env && nano /etc/caddy/caddy.env should do fine.
Paste your token from the previous step inside the file, like so:
Bash1CLOUDFLARE_API_TOKEN=your_cloudflare_api_token_goes_here
Load this environment file when starting Caddy, or source it into your shell. The approach I took is to reload Caddy after exiting the file via systemctl, i.e. sudo systemctl reload caddy
At /etc/caddy/Caddyfile, set up your domain(s). Let’s assume you want to expose access to your Synology home screen service at home.mydomain.com, forwarded to Synology’s Tailscale IP on port 5001 (or whichever service port you like).
Bash1{ 2 email [email protected] 3 debug 4} 5 6(common) { 7 header { 8 # Enable HSTS 9 Strict-Transport-Security "max-age=31536000; includeSubDomains" 10 # Prevent clickjacking 11 X-Frame-Options "DENY" 12 # Help prevent XSS attacks 13 X-Content-Type-Options "nosniff" 14 } 15} 16 17# Handle domain access 18home.mydomain.com { 19 tls { 20 dns cloudflare {env.CLOUDFLARE_API_TOKEN} 21 } 22 import common 23 reverse_proxy 100.xx.xx.xx:5001 { 24 transport http { 25 tls_insecure_skip_verify 26 } 27 } 28}
Where:
home.mydomain.com is the subdomain you created in Cloudflare.100.xx.xx.xx is the Synology’s Tailscale IP you grabbed after installing Tailscale on the NAS.:5001 is an example port—adjust to match the Synology service you want to proxy.Caddy will automatically create and renew a publicly trusted certificate for home.mydomain.com using Cloudflare. The key advantage of the DNS challenge is that Caddy doesn’t need to listen on public ports 80 or 443—perfect if you’re behind Tailscale or otherwise hiding your server.
Finally let's reload Caddy with our new settings.
Bash1sudo systemctl reload caddy
or (if you prefer an alias in your ~/.bash_aliases):
Bash1alias caddyreload='sudo systemctl reload caddy' # Then just do: caddyreload
That’s it for the reverse proxy. You now have a Pi that’s behind Tailscale and is also running Caddy to proxy any domain or subdomain you like to your home services—assuming your DNS points to your Pi’s Tailscale IP. The best part is, you can repeat this for as many subdomains as you like—maybe photos.mydomain.com, media.mydomain.com, etc.—all of them hidden behind Tailscale and fronted by a Pi running Caddy.
If you used a wildcard record, you can define specific sites (subdomains) within Caddy:
Bash1{ 2 email [email protected] 3 debug 4} 5 6(common) { 7 header { 8 Strict-Transport-Security "max-age=31536000; includeSubDomains" 9 X-Frame-Options "DENY" 10 X-Content-Type-Options "nosniff" 11 } 12} 13 14# Example #1: home.mydomain.com -> Synology Tailscale IP:5001 15home.mydomain.com { 16 tls { 17 dns cloudflare {env.CLOUDFLARE_API_TOKEN} 18 } 19 import common 20 reverse_proxy 100.x.x.x:5001 { 21 transport http { 22 tls_insecure_skip_verify 23 } 24 } 25} 26 27# Example #2: files.mydomain.com -> Some other service on port 8000 28files.mydomain.com { 29 tls { 30 dns cloudflare {env.CLOUDFLARE_API_TOKEN} 31 } 32 import common 33 reverse_proxy 100.x.x.x:8000 { 34 transport http { 35 tls_insecure_skip_verify 36 } 37 } 38} 39 40# (Add more subdomains as needed)
Finally, reload Caddy:
Bash1sudo systemctl reload caddy
And that’s it! Now you have a wildcard DNS setup plus a fine-grained Caddy config for each subdomain. This allows you to add or remove subdomains in Caddy at will, without needing to touch Cloudflare DNS again.
One note however: you'll want to notice that with each new subdomain youn specify, you'll want to allocate a specific port for that service. That way, despite using the same underlying Synology IP, you'll be able to route to its different services.
Now for the fun part: hosting a local LLM (Large Language Model) so you can query it from anywhere, while still keeping it private behind Tailscale.
Ollama is a neat utility that makes it easy to download and run large language models on your own hardware—CPU or GPU. We’ll run it in Container Manager on a Synology NAS in my case, but you can do the same on the Pi or any Docker-capable box.
Create an Ollama directory in your volume
Bash1sudo mkdir /volume1/docker/
Give that directory permissions
Bash1sudo chmod 755 /volume1/docker/
Create the requisite Ollama directory
Bash1sudo mkdir /volume1/docker/caddy/
Give Ollama permissions
Bash1sudo chmod 755 /volume1/docker/ollama
Create a Docker Compose File
On your Synology, open up Container Manager (or the Docker UI, depending on DSM version). Create a new Project and paste something like:
YAML1version: "3" 2 3services: 4 webui: 5 image: ollamawebui/ollama-webui:latest 6 ports: 7 - "3000:8080" 8 environment: 9 - OLLAMA_API_BASE_URL=https://llm.mydomain.com 10 volumes: 11 - open-webui:/data 12 depends_on: 13 - ollama 14 network_mode: synobridge 15 16 ollama: 17 image: ollama/ollama:latest 18 container_name: ollama 19 hostname: llm.mydomain.com 20 environment: 21 PUID: 1027 22 PGID: 65536 23 UMASK: 002 24 TZ: 'America/Los_Angeles' 25 VIRTUAL_HOST: 'llm.mydomain.com' 26 volumes: 27 - /volume1/docker/ollama:/root/.ollama 28 ports: 29 - "11434:11434" 30 restart: unless-stopped 31 network_mode: synobridge 32volumes: 33 open-webui:
That means:
ollama/ollama:latest.11434 is exposed, so you can hit the model with http://<SynologyIP>:11434./volume1/docker/ollama.Deploy the Container
curl http://<SynologyIP>:11434, you’re in business.In the Docker Compose file, you'll notice we're using network_mode: synobridge. Synobridge is Synology's bridge network driver that allows Docker containers to communicate as if they were on your local network. This means containers using synobridge can:
To use synobridge, make sure the "Use the same network as Docker Host" option is enabled in Container Manager when creating your container. You can find this under Network settings. If you prefer to use Docker's default bridge network instead, you can simply omit the network_mode line entirely - though you might need to set up explicit container-to-container networking if you add more services later. If you do want or need to proceed with synobridge, check out this article for setup instructions.
Ollama hosts a library of models you can pull. For instance:
Bash1curl -X POST http://<SynologyIP>:11434/api/pull -d '{ "name": "llama3.2:1b" }'
Note: We’re using a small 1B param model so it fits in ~4GB RAM. Models like 7B, 13B, or 70B will require significantly more memory.
If you want to pipe the model through your Pi’s reverse proxy:
Edit Caddyfile
Point llm.yourdomain.com to <SynologyIP>:11434 (or whatever your Synology’s LAN IP is).
Bash1llm.yourdomain.com { 2tls { 3 dns cloudflare {env.CLOUDFLARE_API_TOKEN} 4} 5import common 6reverse_proxy http://100.xx.xx.xx:11434 { 7 header_up Host {http.reverse_proxy.upstream.hostport} 8} 9}
Reload Caddy
Bash1caddyreload
Now hitting https://llm.yourdomain.com/api/generate will forward traffic to your Synology’s Ollama container on port 11434.
Now that our LLM is safely tucked behind Tailscale, it’s time to actually use it! We’ll confirm everything works by accessing the LLM from a local computer (or laptop) that’s already on our Tailscale network.
First, let’s do a quick check in the terminal to ensure our output is correct:
Bash1curl -v https://llm.mydomain.com/api/version
Let's check our output:
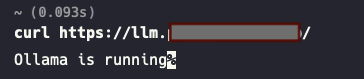
We have successfully connected to Ollama!
Here’s what’s happening:
llm.mydomain.com), which points to the Raspberry Pi’s Tailscale IP.If you set up the Ollama Web UI and pointed a domain like ui.mydomain.com at it, open your browser:
https://ui.mydomain.com
You should see a straightforward interface listing any models you’ve downloaded. From there, you can select a model and start chatting. If you hit connection errors, double-check:
/etc/caddy/Caddyfile for ui.mydomain.com.3000:8080 or however you set it up).If you’re a command-line fan and want to chat via curl, try:
Bash1curl -X POST https://llm.mydomain.com/api/chat \ 2 -d '{ 3 "model": "llama3.2:1b", 4 "messages": [ 5 {"role": "user", "content": "Tell me a joke!"} 6 ], 7 "stream": false 8 }'
With "stream": false, the response should arrive in one shot. If you’d rather see each token appear in real time, set "stream": true and watch the output scroll by.
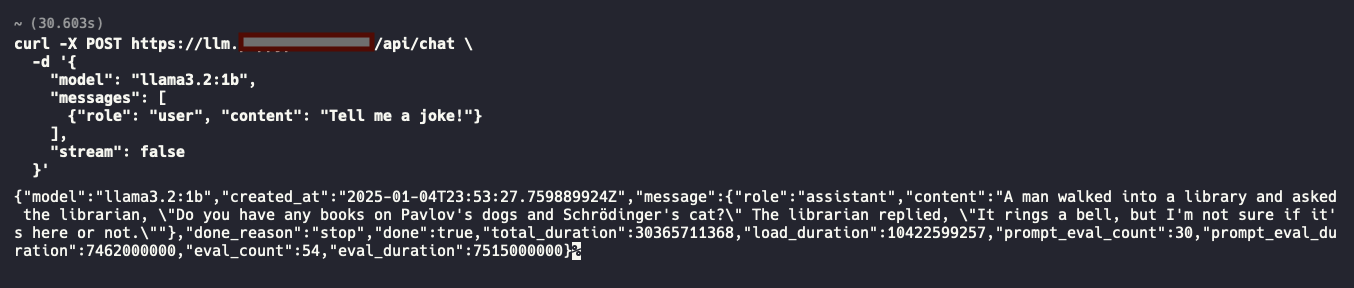
In depth Ollama query via your CLI using Ollama. We get a successful response from the LLM!
For extra convenience, you can add a quick alias in your ~/.bashrc (or ~/.zshrc) to query the LLM without retyping curl all the time:
Bash1alias @='f(){ \ 2 curl -s -X POST "https://llm.mydomain.com/api/chat" \ 3 -d "{\"model\":\"llama3.2:1b\",\"messages\":[{\"role\":\"user\",\"content\":\"$*\"}],\"stream\":false}" \ 4 | jq -r .message.content; \ 5 unset -f f; \ 6}; f'
Then, just open a new terminal (or run source ~/.bashrc) and do: @ "Knock knock"
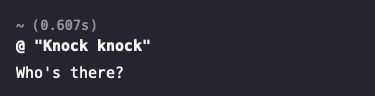
Response from the CLI API call to the hosted model.
Voila! Instant local LLM request from your Tailscale-protected domain.
ping <your-pi-tailscale-ip> or curl <synology-tailscale-ip>:11434. If that fails, something’s up with Tailscale or your Docker container.With this, you’ve proven your local LLM is not only up and running, but also accessible from anywhere you’re connected via Tailscale—fully encrypted, no weird firewall rules, and no random open ports to the public internet.
Keep an eye out for part two this series in which I demonstrate how to take your LLM to the next level and operate as your own, private knowledge system you can query with natural from anywhere in the world!
Related reading
Newer post
A new paper on the impact of AI on labor demand at the firm level.
Older post
Reflections on a year of growth, experimentation, and resilience—covering professional wins, personal pursuits like archery and lifting, and the challenges of navigating health setbacks. Plus, my goals for 2025.
Stay in the loop
No spam — just updates when something new ships or the book hits a milestone.